Introduction Link to heading
Welcome to the first episode of “Cruising the Bytes: An Engineer’s Expeditions”! In this episode, we aim to set up a full-stack Single Page Application (SPA) project using Angular for the frontend and Spring Boot for the backend. This powerful combination offers seamless integration and rapid development capabilities, providing a solid foundation for your web application ventures.
Before we dive into the technical bits, let’s briefly acknowledge a similar setup supported by .NET Core templates. While our focus lies on Angular and Spring Boot, it’s worth noting that .NET Core also offers robust templates for building full-stack applications, providing developers with a diverse range of options for their projects. Read more about this here
Creating the spring boot application Link to heading
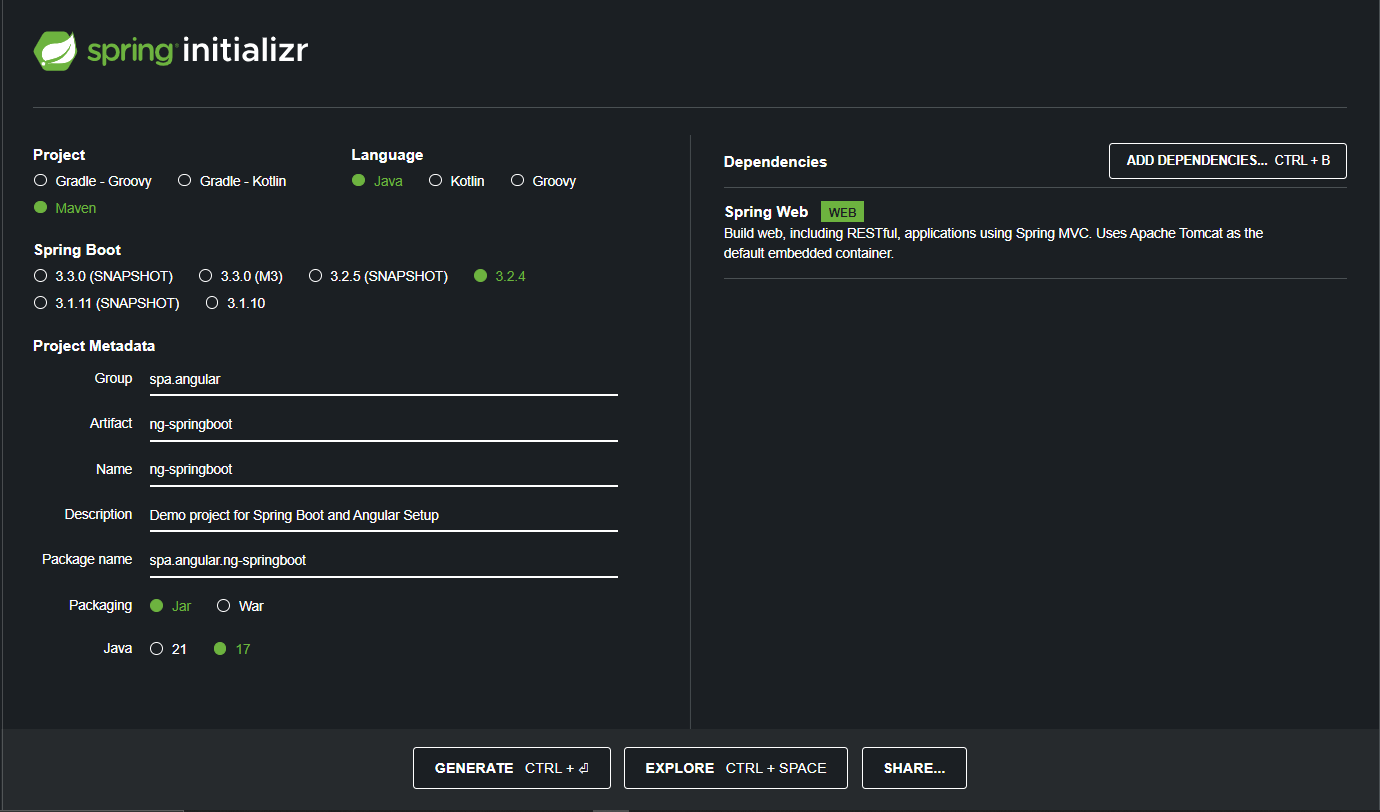
Let’s start by creating a Spring Boot application, the backbone of our backend infrastructure. While there are multiple methods to accomplish this task, we’ll leverage the Spring Initializr web tool for its simplicity and efficiency. Navigate to Spring Initializr in your web browser to access this invaluable resource. Here, you’ll encounter a user-friendly interface that allows you to customize your project specifications according to your needs. For our case, we name our Spring Boot project “ng-springboot”. Select the necessary dependencies for your project, ensuring compatibility and functionality. Consider dependencies such as “Spring Web” for building RESTful APIs.
With our Spring Boot project ready, let’s fire up our development environment. If you prefer using an Integrated Development Environment (IDE) like NetBeans, import the project into NetBeans by selecting “File” > “Open Project” and navigating to the directory where you unzipped your project.
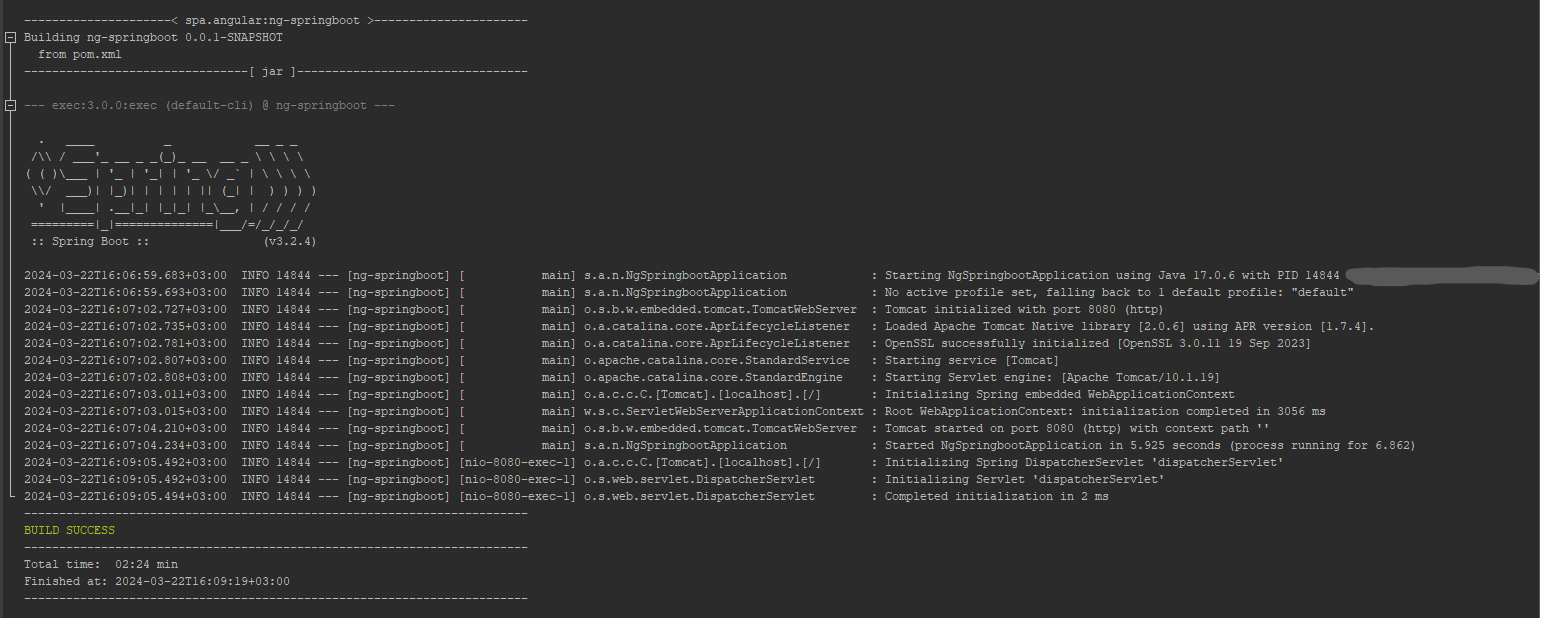
Alternatively, if you prefer the command line, navigate to the project directory in your terminal and run the application using Maven. Enter the command mvn spring-boot:run to start the Spring Boot application.
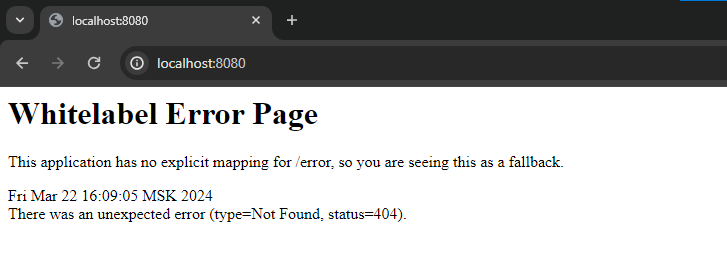
As the application boots up, keep an eye on the console for any errors or warnings. Once the application has started successfully, open your web browser and visit the designated URL to verify its functionality.
Creating the angular application Link to heading
With our Spring Boot backend set up and running smoothly, it’s time to integrate the Angular frontend into our project. Before we proceed, ensure that both Angular and Node.js are installed on your system. If you haven’t already installed them, you can refer to the following guides:
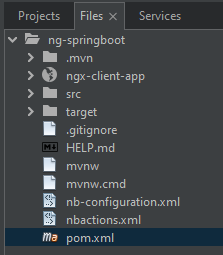
For this purpose, we’ll name our Angular project “ngx-client-app”. Well you can choose any appropriate name, in Angular terminology, “ngx” typically signifies an Angular extension or library. It’s all about preference. What does ngx mean. We create the angular app in the root folder of the spring boot project.
Run the angular application (from the angular app root directory… ng serve, npm start, yarn start e.t.c) and observe the terminal output for any errors or warnings, and once the Angular application is successfully compiled and served, open your web browser and navigate to the specified URL (usually http://localhost:4200). You should see the default Angular starter page loading correctly, indicating that the integration was successful.

Serving the angular app from springboot Link to heading
To seamlessly integrate our Angular frontend with our Spring Boot backend, we need to configure Spring Boot to serve the Angular app. This involves creating a configuration class and adjusting our application.yaml file to ensure that requests are routed correctly. We begin by creating a configuration class called WebConfig.java, which implements the WebMvcConfigurer interface. This class allows us to customize Spring MVC configuration settings to serve our Angular resources as expected.
    package spa.configuration;

    ...

    @Configuration
    public class WebConfig implements WebMvcConfigurer {

        @Override
        public void addResourceHandlers(ResourceHandlerRegistry registry) {
            registry.addResourceHandler("/**")
                    .addResourceLocations("classpath:/static/app/")
                    .resourceChain(true)
                    .addResolver(new PathResourceResolver() {
                        @Override
                        protected Resource getResource(String resourcePath, Resource location) throws IOException {
                            Resource requestedResource = location.createRelative(resourcePath);
                            return requestedResource.exists() && requestedResource.isReadable() ? requestedResource : new ClassPathResource("static/app/index.html");
                        }
                    });
        }

        @Override
        public void addViewControllers(ViewControllerRegistry registry) {
            registry.addViewController("/").setViewName("forward:/index.html");
            registry.addViewController("/{x:[\\w\\-]+}").setViewName("forward:/index.html");
            registry.addViewController("/{x:^(?!api$).*$}/**/{y:[\\w\\-]+}").setViewName("forward:/index.html");
        }

        @Override
        public void configurePathMatch(PathMatchConfigurer configurer) {
            configurer.setUseRegisteredSuffixPatternMatch(true);
        }
    }
Here’s what each override in the WebConfig.java class does
addResourceHandlers: Overrides the method to define custom resource handling for serving static resources such as HTML, CSS, and JavaScript files. It configures Spring MVC to serve resources from the “classpath:/static/app/” directory and specifies a custom resolver to handle resource requests.
addViewControllers: Overrides the method to define view controller mappings, which specify how incoming requests are handled and mapped to specific views. In this case, it forwards requests to the “index.html” file, allowing Angular’s client-side routing to handle the navigation.
configurePathMatch: Overrides the method to configure path matching options. Setting setUseRegisteredSuffixPatternMatch(true) enables Spring MVC to match URL paths with registered suffix patterns, enhancing routing flexibility.
The application settings are shown below. By default, when Spring Boot encounters an error and does not find a specific error page configured, it automatically generates a default error page known as the Whitelabel Error Page. We disable this to let let our WebConfig handle how such requests from angular are served.
    ## YAML Template.
    ---

    server:
        port: 8080
        error:
            whitelabel:
                enabled: false

    spring:
        config:
            activate:
                on-profile: local
        resources:
            static-locations: classpath:/static/
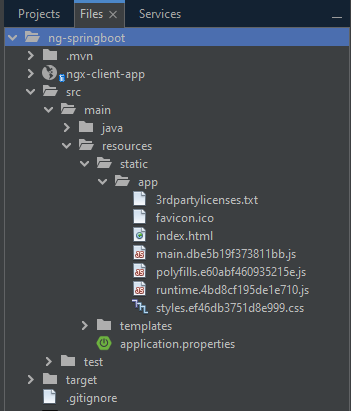
Now you can build the angular application (ng build) to generate dist files. These will be in the angular app’s root folder, under /dist/ngx-client-app by default. Copy these dist files to the spring boot resource folder where we want the app to be served from i.e resources/static/app.
Run the spring boot application and observe the output for any errors. If the project conpiles succesfully you should see the default path serving the angular default pge instead of the White label error page as before.
Notable additions Link to heading
At this point you already have a unified full stack application in Angular & spring boot. What you can achieve from here is only limited by your creativity and resilience.
Here are just a few enhancements and tests to ensure smooth operation and valid functionality.
Maven Build Plugin for Angular Project Link to heading
Manually building the Angular project and copying the distribution files to the Spring Boot resources directory can be cumbersome and error-prone. To streamline this process, we’ve added a Maven build plugin to handle the build of the Angular project automatically. Additionally, update the Angular configuration to specify the desired directory for the distribution files on every build.
Angular Configuration: angular.json
    ...
    "architect": {
        "build": {
            "builder": "@angular-devkit/build-angular:browser",
            "options": {
                "outputPath": "../src/main/resources/static/app",
                "index": "src/index.html",
                "main": "src/main.ts"
            }
        }
        ...
    }
    ...
Maven Configuration: pom.xml
    <plugins>
        <!-- Spring Boot Maven Plugin -->
        <plugin>
            <groupId>org.springframework.boot</groupId>
            <artifactId>spring-boot-maven-plugin</artifactId>
        </plugin>
        <!-- Frontend Maven Plugin for Angular -->
        <plugin>
            <groupId>com.github.eirslett</groupId>
            <artifactId>frontend-maven-plugin</artifactId>
            <version>1.12.0</version>
            <executions>
                <!-- Install Node.js and Yarn -->
                <execution>
                    <id>install node and yarn</id>
                    <goals>
                        <goal>install-node-and-yarn</goal>
                    </goals>
                    <configuration>
                        <nodeVersion>v18.10.0</nodeVersion>
                        <yarnVersion>v1.22.19</yarnVersion>
                        <workingDirectory>ngx-client-app</workingDirectory>
                    </configuration>
                </execution>
                <!-- Build Angular Project -->
                <execution>
                    <id>yarn build</id>
                    <goals>
                        <goal>yarn</goal>
                    </goals>
                    <configuration>
                        <arguments>run build</arguments>
                        <workingDirectory>ngx-client-app</workingDirectory>
                    </configuration>
                </execution>
                <!-- Add more executions for other npm/yarn commands as needed -->
            </executions>
        </plugin>
    </plugins>
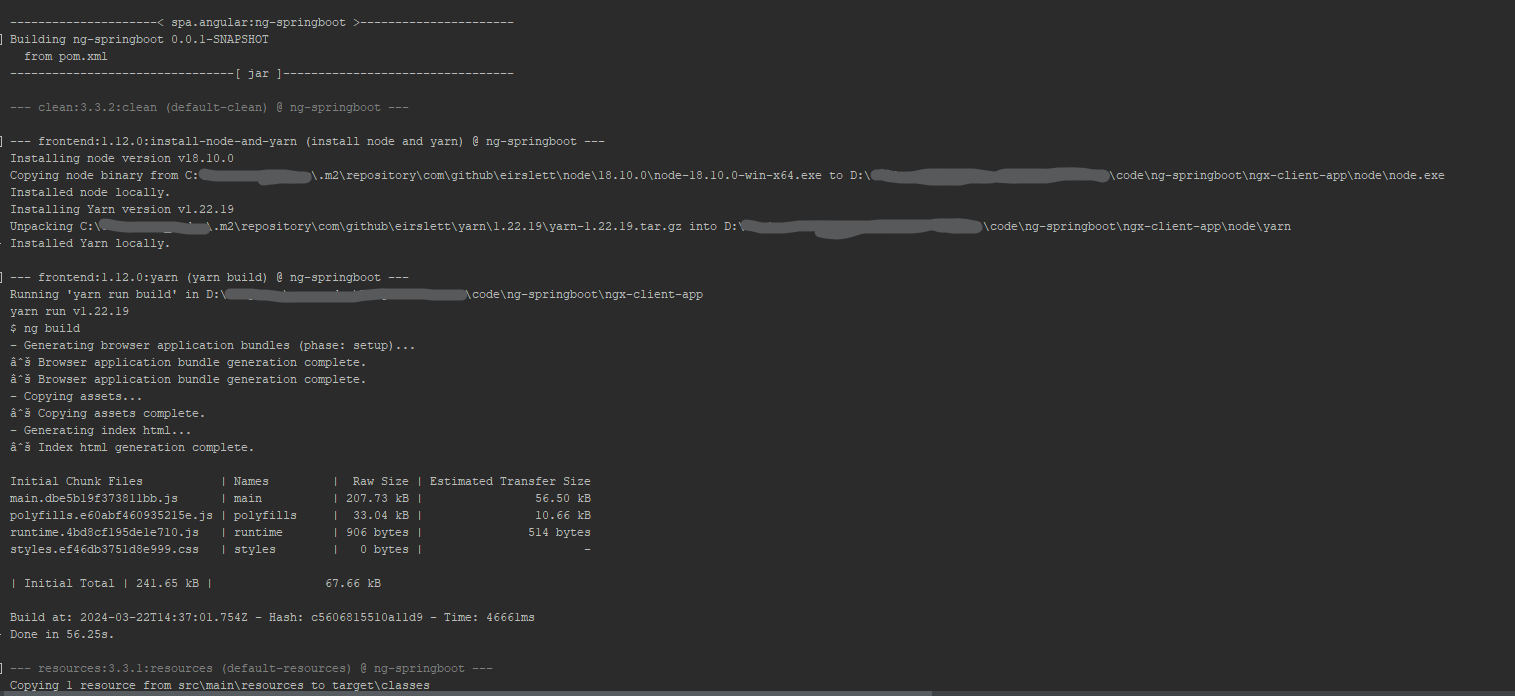
With this configuration, you should be able to build and generate you angular dist files in the desired path as part of the spring boot build excecution process.
Testing Angular Requests and Backend APIs Link to heading
To ensure the correct handling of Angular requests and backend APIs, you can implement a series of tests. Firstly, set up Angular routes between two pages, home and hello, and verify that route navigation works as expected. Additionally, test page reloads on active Angular routes to ensure smooth functioning without triggering HTTP errors in Spring Boot.
Angular Routing Configuration: app-routing.module.ts
    const routes: Routes = [
        {
            path: '',
            component: HomeComponent
        },
        {
            path: 'hello',
            component: HelloComponent
        }
    ];

    @NgModule({
        imports: [RouterModule.forRoot(routes)],
        exports: [RouterModule]
    })
    export class AppRoutingModule { }
Backend Controller for API Testing Link to heading
For testing the backend APIs, create a simple HelloController that returns a “Hello, world!” message. This controller ensures that backend requests are served correctly, completing the end-to-end testing of our full-stack application. Update the Hello page in angular to call this backend controller and display the message in the UI.
Backend Controller: HelloController.java
    @RestController
    @RequestMapping("/api")
    public class HelloController {

        @GetMapping("/hello")
        public String sayHello() {
            String jsonData = "{\"message\": \"Hello, world!\"}";
            return jsonData;
        }
    }
Angular Component for Backend Integration: hello.component.ts
    export class HelloComponent implements OnInit {
        backendMessage: string = '';

        constructor(private http: HttpClient) {}

        ngOnInit(): void {
            this.http.get('/api/hello').pipe(
                catchError((error: any) => {
                    return of(error);
                })
            ).subscribe((response: any) => {
                this.backendMessage = response.message as string;
            });
        }
    }
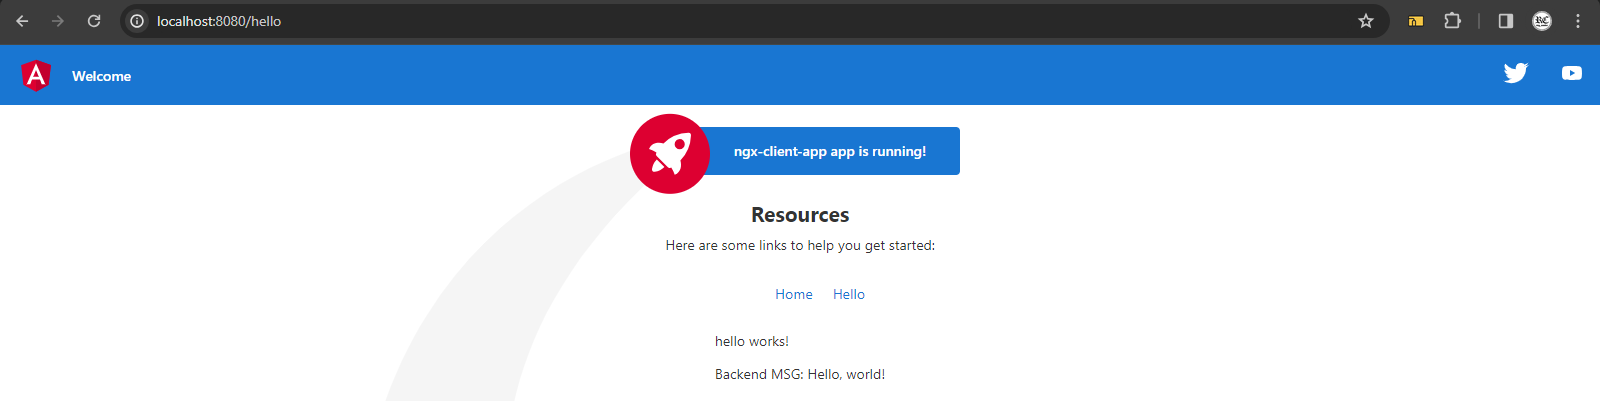
After succesfull application of these adjustments, you should observe smooth working and integration between the angular app and springboot API.
With these notable additions and thorough testing procedures in place, our full-stack project is now ready for further advancement. The foundation has been laid for implementing business logic, refining UI/UX, and delivering a polished, feature-rich application to users.
Conclusion Link to heading
The project files for our expedition are available on Github for reference and further exploration. Follow this Github link to access the project repository.
As we conclude this episode, our journey is far from over. Fair winds and following seas await as we navigate the ever-evolving landscape of software engineering. Until next time, happy coding!